Hellooo, people of the Internet!
How have you been? Yeah, you! (one of those three people who read my blog) How’s life?
.
.
*You talking*
.
.
Oh….Cool, cool. Nice to know!
Back to the blog now ^^
As it’s graduation time in Lithuania, I decided to make a little DIY (my first one, wooooohoo) related with that. It might not be helpful for you now though because the graduation time in every part of the world is a bit different buuuut… who said it won’t next year haha?
So today I’ll show you how to make graduation caps/mortarboards. If you’re planing to congratulate the lucky one who’s graduated, you can attach these tiny mortarboards on the present you’re giving (it would look like you’ve stepped up your present-wrapping game!) or even decorate flower bouquets. Basically, use your imagination!
For this DIY you’ll need (or… what I used):
- Couple sheets of black paper. The thicker kind. (I’m not trying to be racist here haha. You can chose whichever color you like!)
- A paper cutting knife (not that necessary)
- A pair of scissors
- A ruler
- A pencil
- A neddle
- Some thread
- Something to glue with (I used double sided tape just because I find that it’s very easy to use: it’s quick, nothing’s sliding out of place.)
Steps (I believe that the pictures will explain a lot better then my words… but I’ll still try haha):
1. Cut out a perfect square (you can use a checked paper to help you make the squares more precise). Sizes can vary! (I chose to make 6cmx6cm)

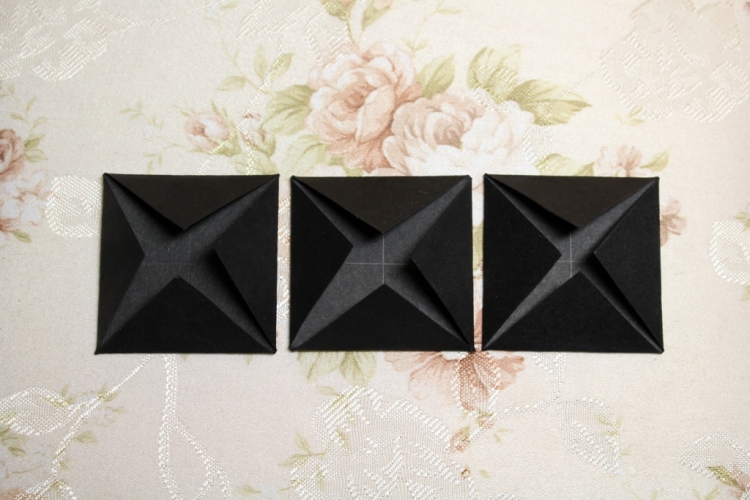
2. Find a center of your square by connecting opposite corners together. The place where both lines meet is the center. Just saying. Now, fold the corners so that they meet in the center, like so:
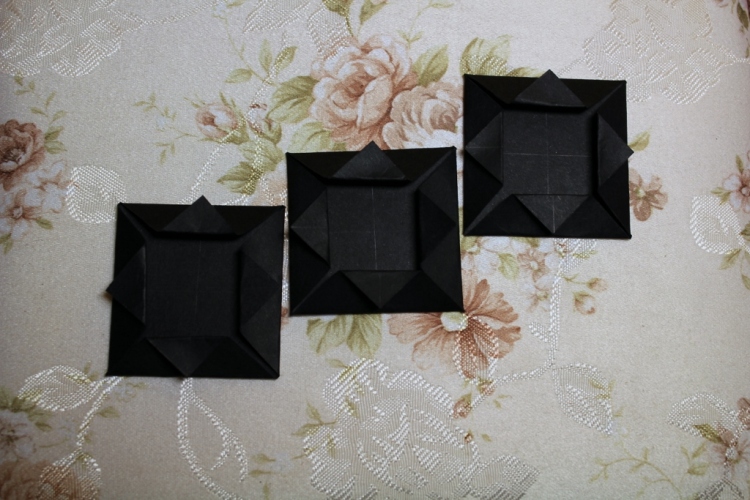
3. Fold every corner once again so that their very tips meet the edge of a square, like so:
4. Now, cut out a string and make a circle (the width of mine was ~1,5cm). By the way, you may want to practice and measure the length first before you glue the ends together because sometimes it can get tricky.
5. Put glue (or whatever you’re using) on the triangles that you got in step #3 and stick the circle to them. Make sure that the triangles are inside of the ring.

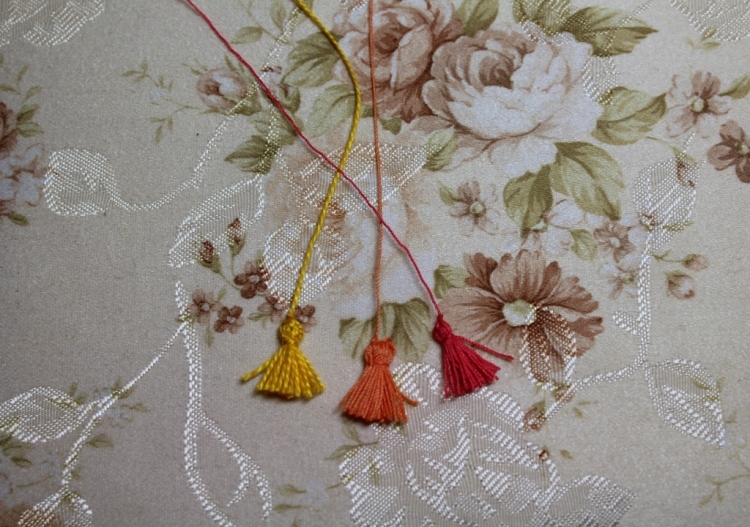
6. Lets make the tassel! Wrap your thread around two of your fingers (or more if you want a bigger tassel, duuh) a bunch of times and make loop. Take another piece of thread, thread it though the loop and tie a knot.
7.Tie another knot (as you can see in the picture) and cut off the extra.
8.Thread your needle with the thread from the first knot and attach the tassel to the very center of the cap. Adjust the length and glue a piece of the same paper on the end of the string for a cleaner finish.
You are done!!! I hope it wasn’t too confusing… If you’re planing to make some – good luck!
Send me some picutes if you do via twitter (@AkvileeB), kik (@Akvilee359) or snapchat (@aakvile).
P.S. If you want to see my outfit for the graduation event, click here: “GRADUATION“.
Be different. Be weird.
Akvilė ^^


Thank you for liking my post, these little mortarboards are so cute!
LikeLike
Awww thanks! ^^
LikeLiked by 1 person
Wow i didnt know you were that good at this… I should have read more the first time not that you are a racists lol fyi im black and didnt take offense… but those grad caps are symbolic to slavery any why great blog
LikeLiked by 1 person
Umm.. I don’t really understand how these little mortarboards can be related with slavery. And if someone’s offended by that I apologize 🙂
LikeLike